How to Create Parameter Buttons in Tableau
This approach helps improve the limited parameter UI, making it more intuitive and user-friendly.
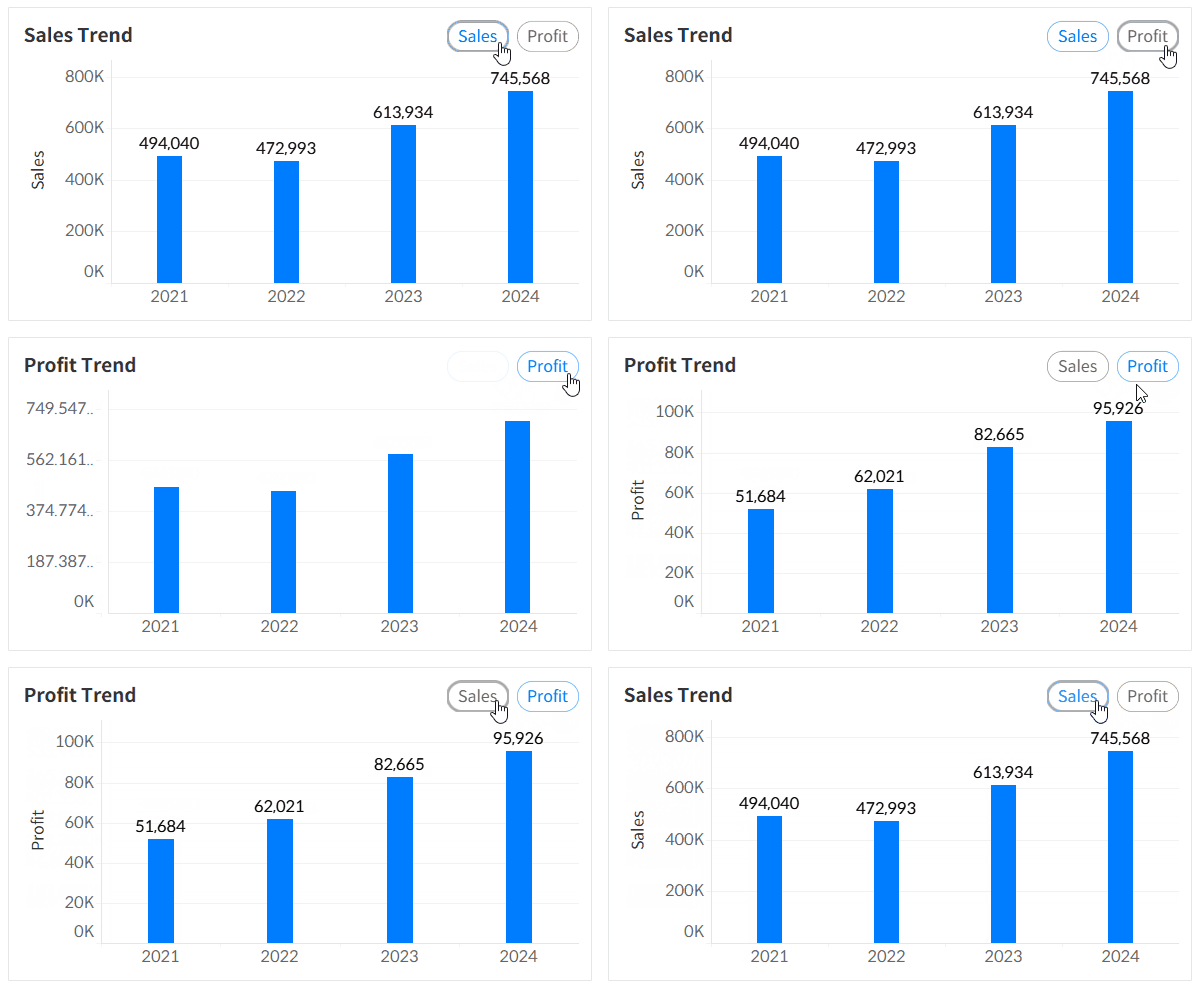
Tableau provides four types of parameter UI, but each has its limitations when used in a dashboard:
- Single Value List: The list can only be arranged vertically.
- Compact List: Font formatting isn’t applied until the dropdown is expanded.
- Slider: Mostly used for specific cases like pagination or setting thresholds with numeric values.
- Type In: Useful in cases like searching within a string.
Given these constraints, here’s a way to create a more flexible, web-like interface for better usability in certain scenarios.
Step-by-Step: Creating Parameter Button
- Create a parameter.
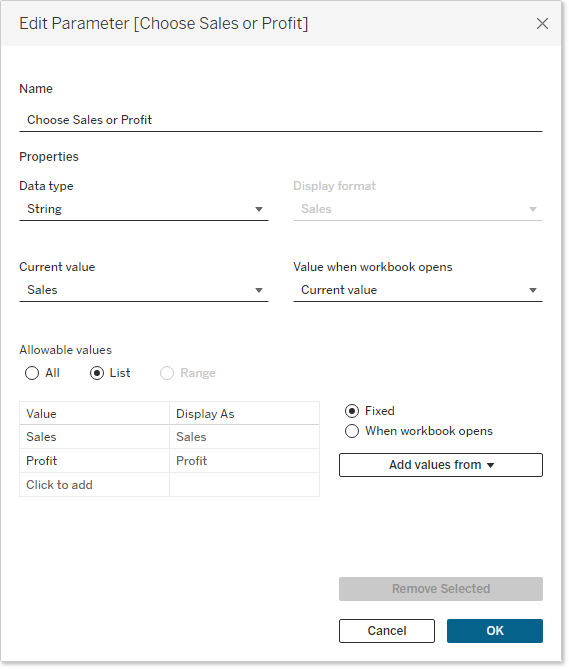
- Create a calculated field that will be used to make the buttons.
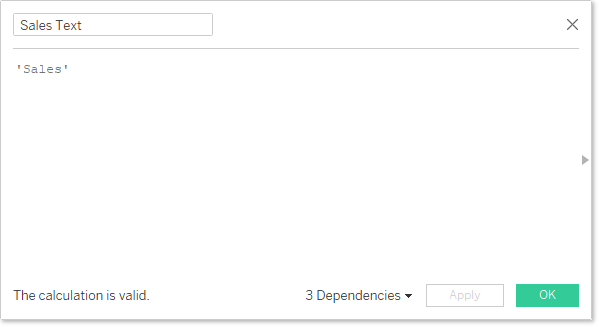
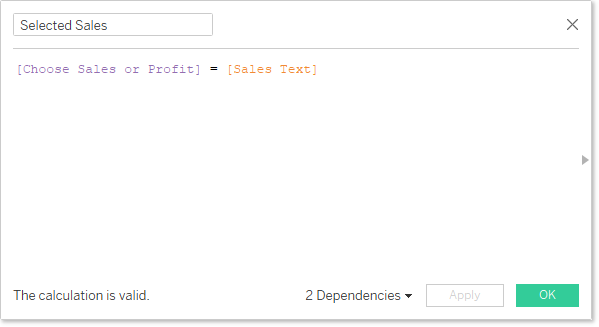
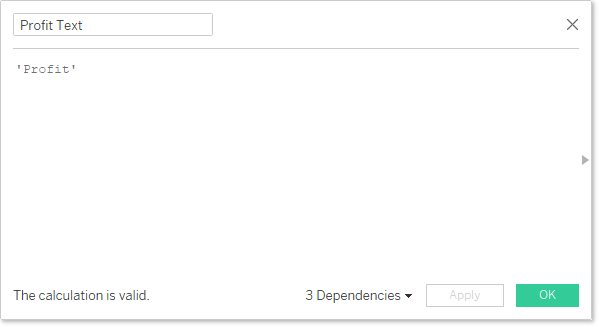
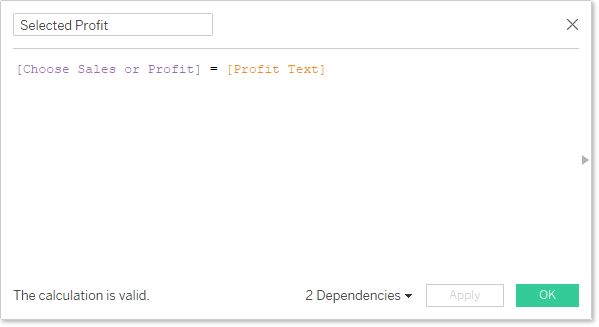
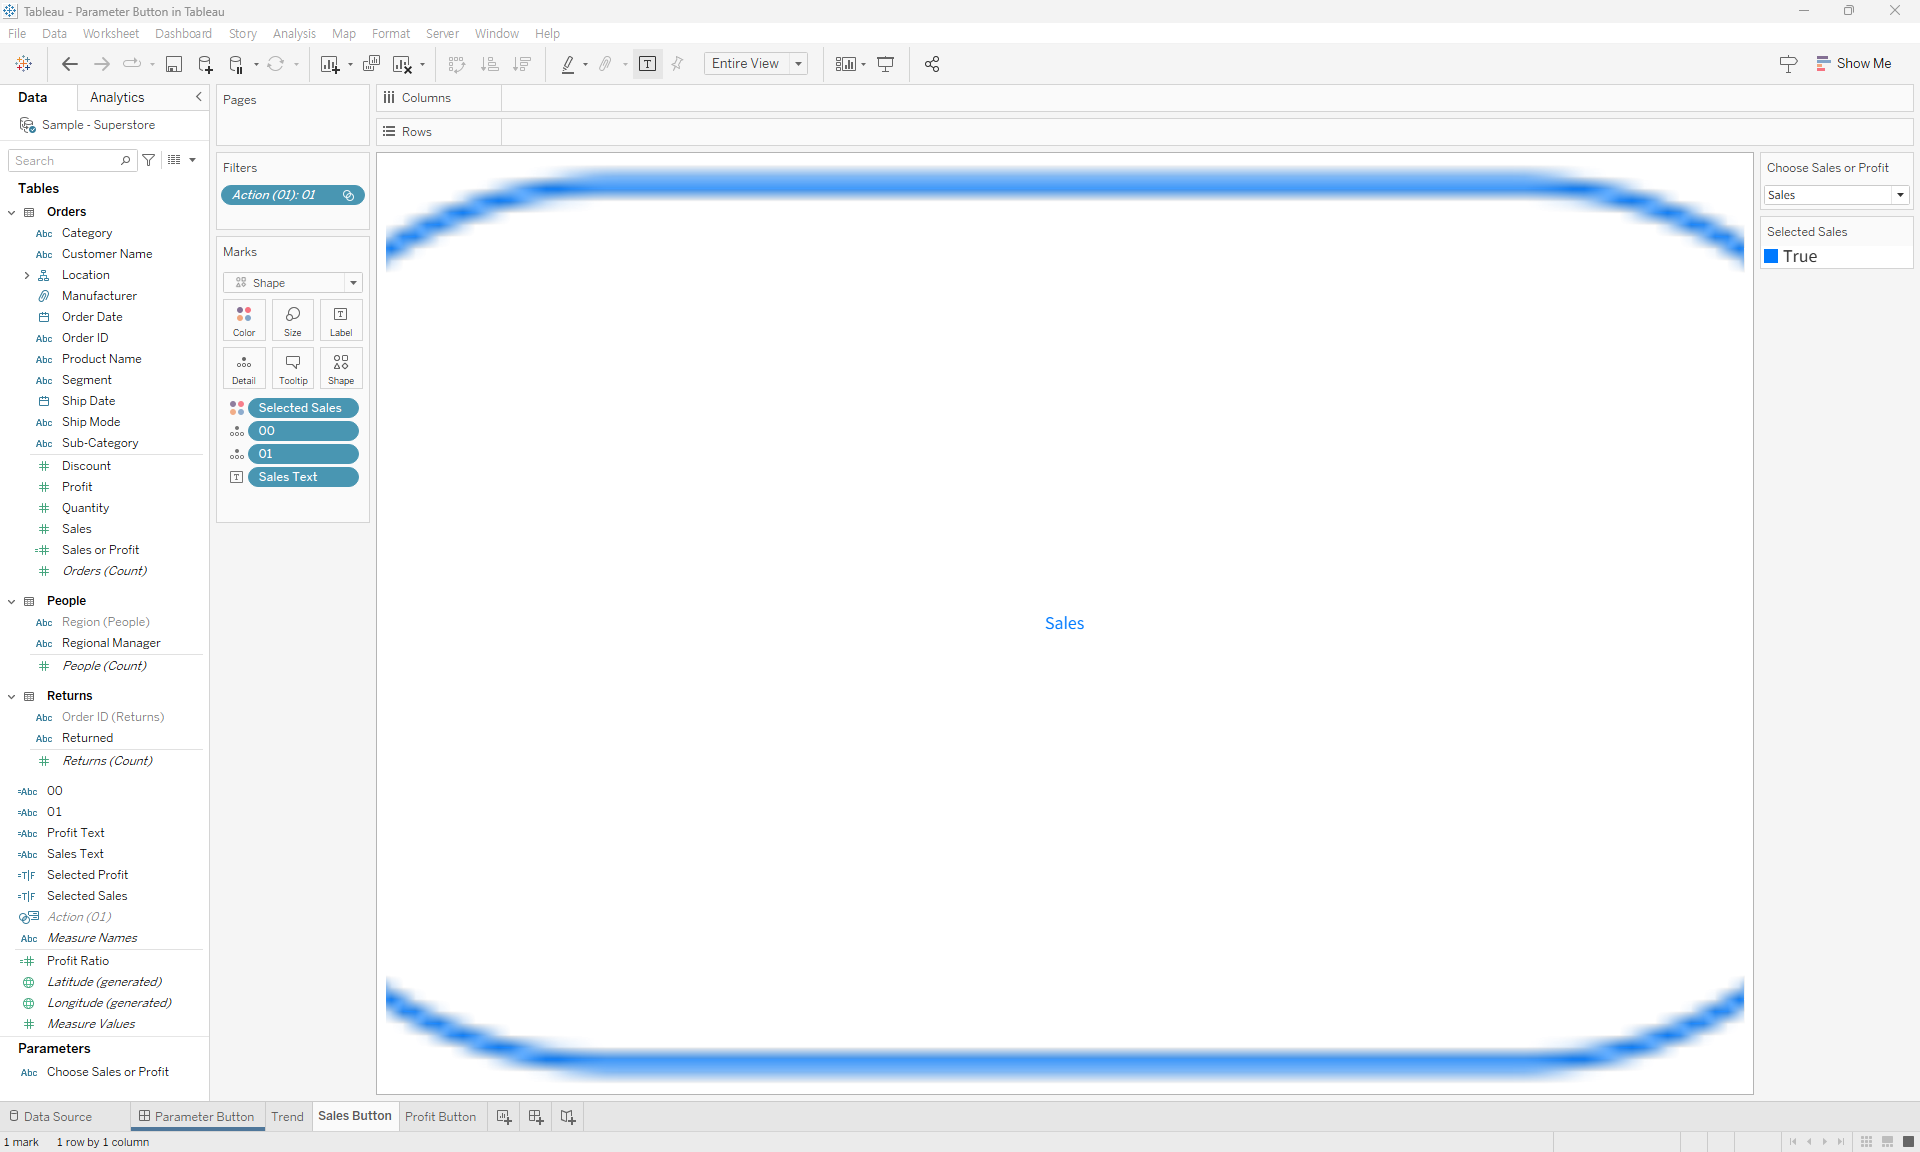
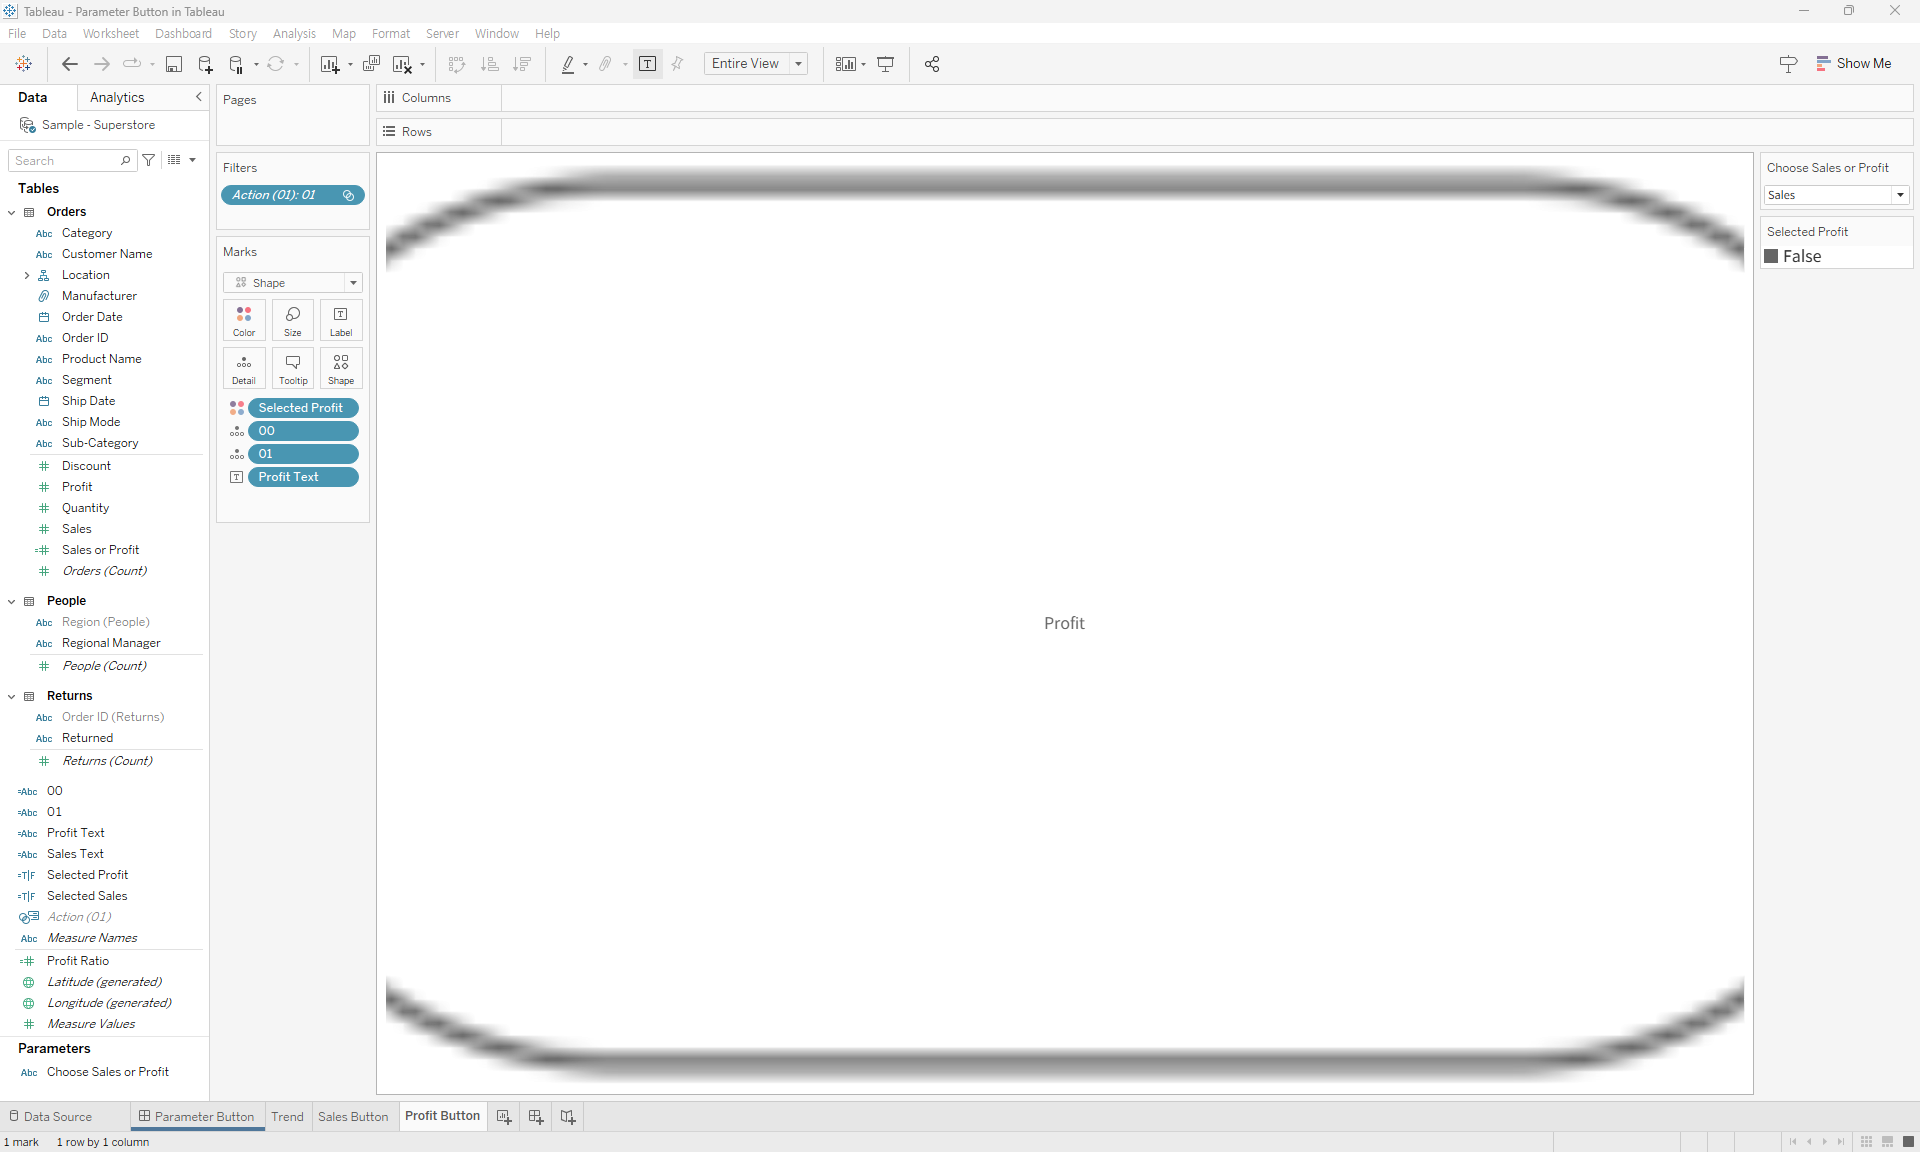
- Make a sheet for each button.
- Create a calculated field to apply conditions based on the parameter value.
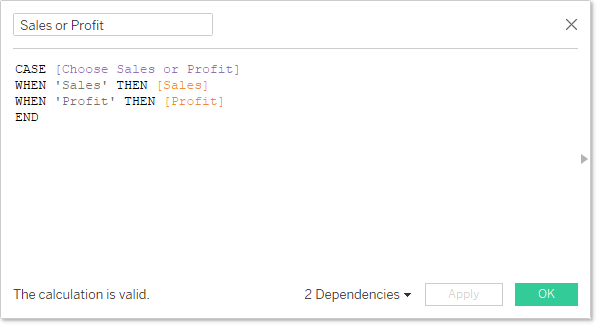
- Create a sheet that uses conditions based on the parameter value.
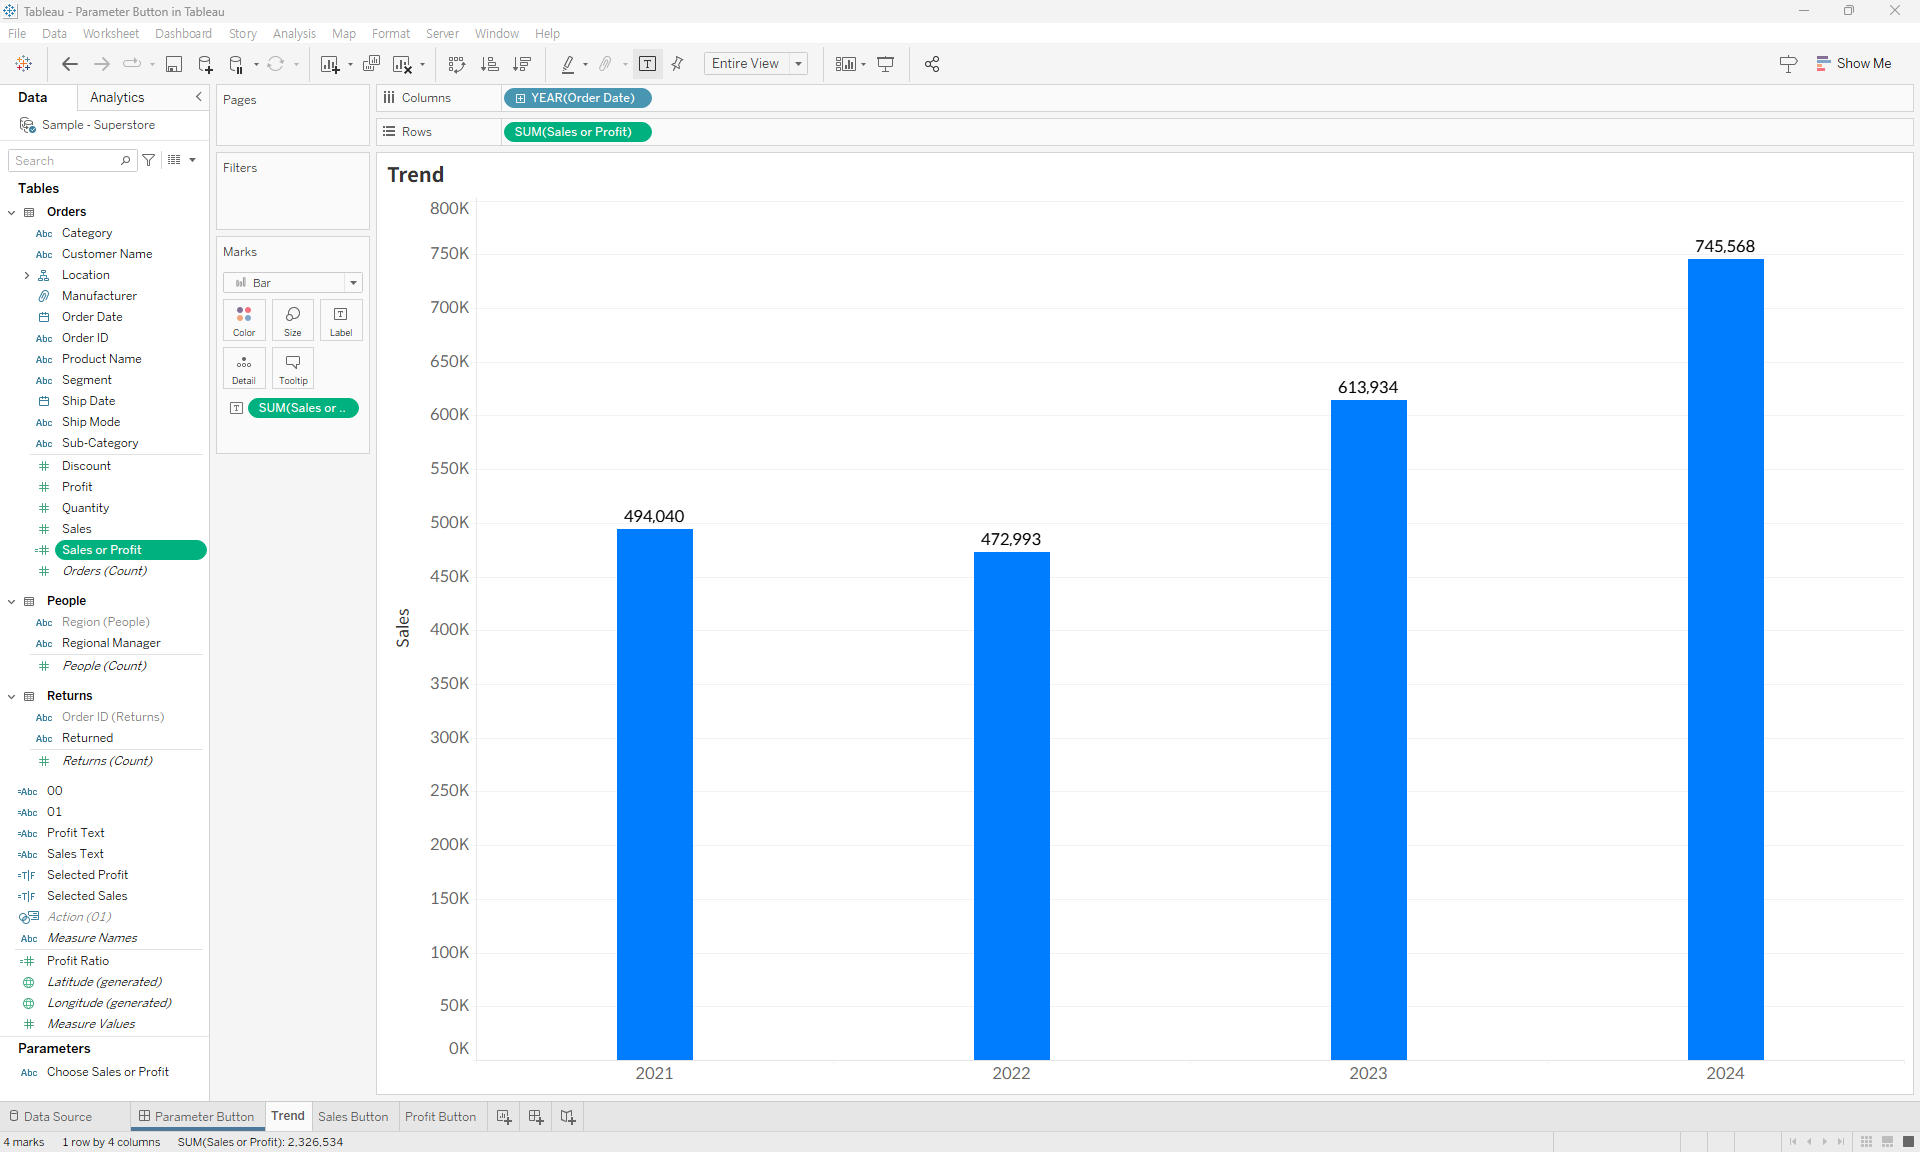
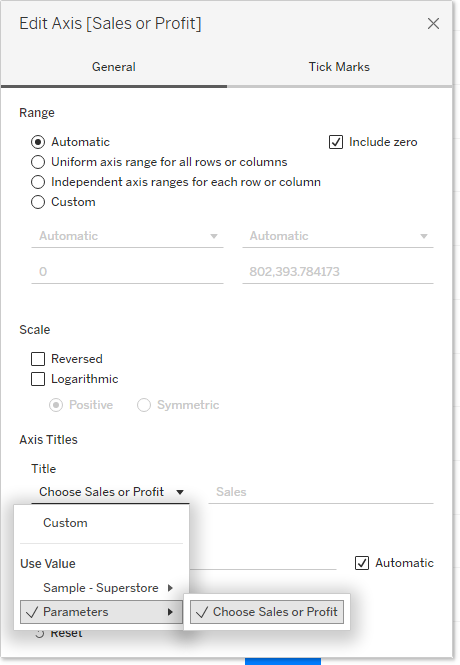
💡
The feature to change axis titles based on parameter values has been available since version 2023.1.
- Place it on the dashboard.
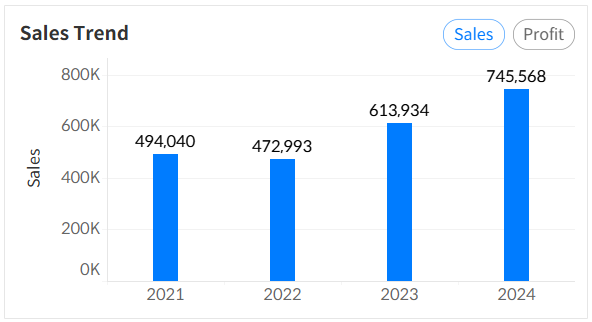
- Create dashboard actions.
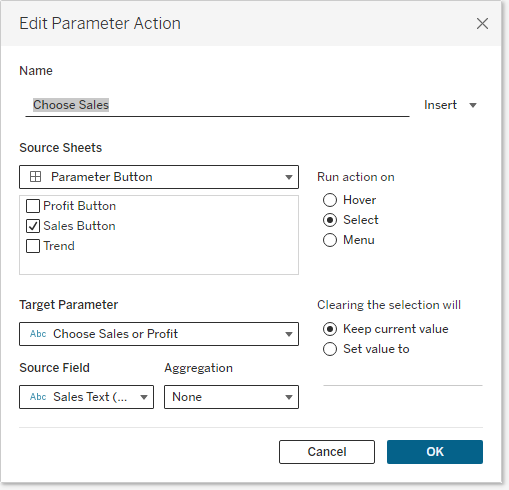
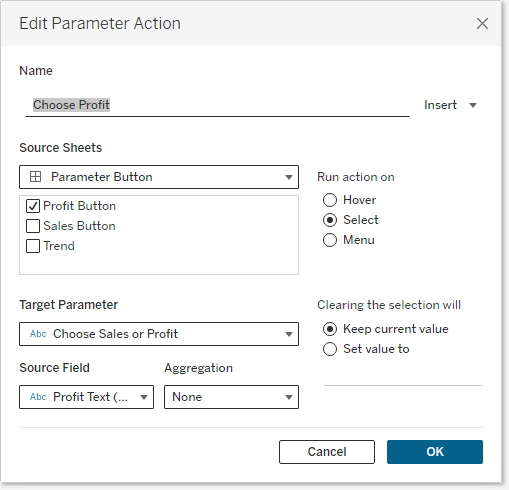
If you’ve completed these steps, you’ll have basic button functionality with parameter actions. However, as noted in a previous post, Tableau’s default behavior keeps clicked items highlighted on the dashboard. You’ll need to add an action to remove this highlighting.
How to Disable Selection Highlighting in Tableau
This is how you can prevent the blue shading highlight that appears when selecting a specific area on a dashboard for interaction.
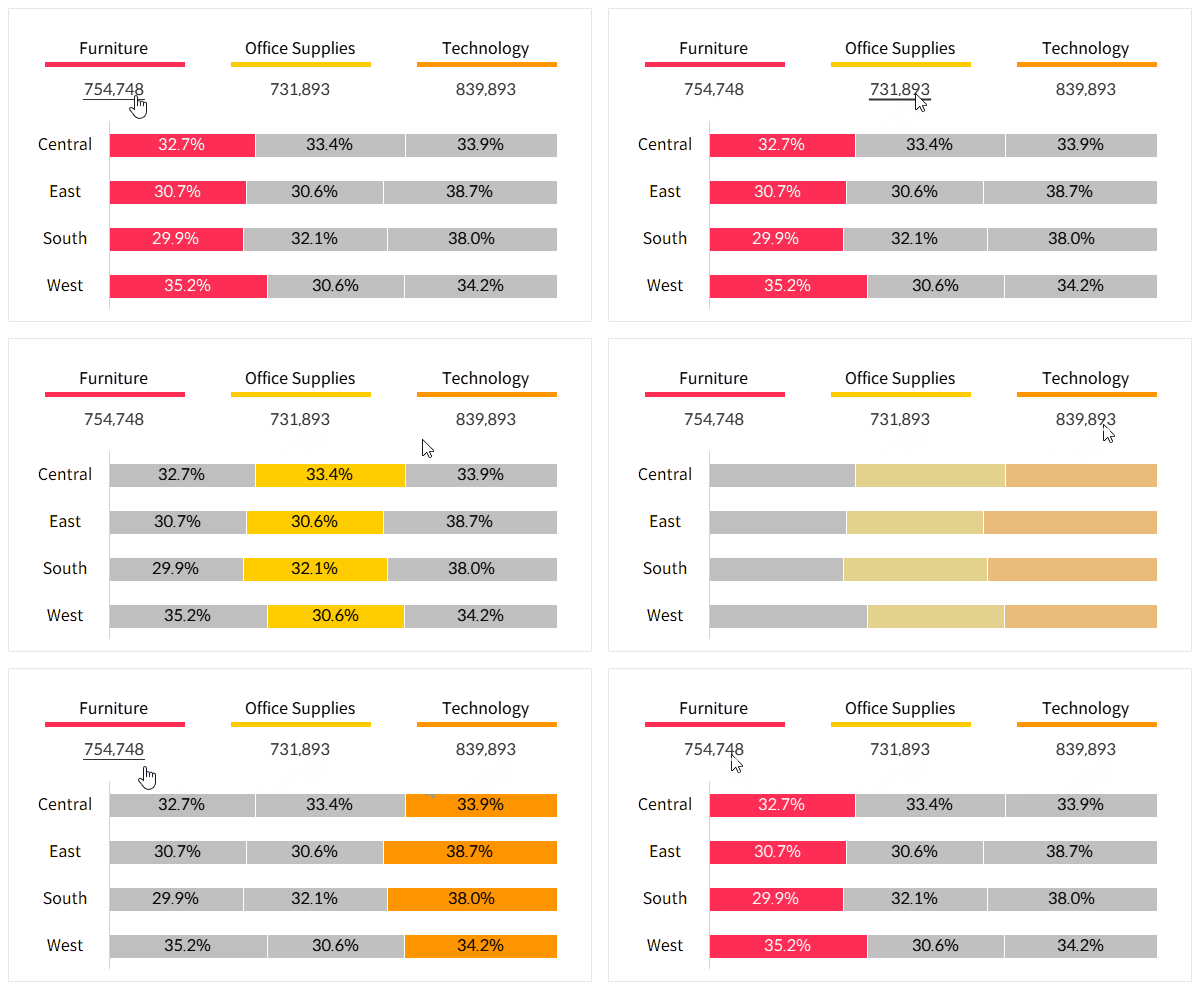
- Create a calculated field needed to disable the selection highlight.


- Create dashboard actions to disable the selection highlight.
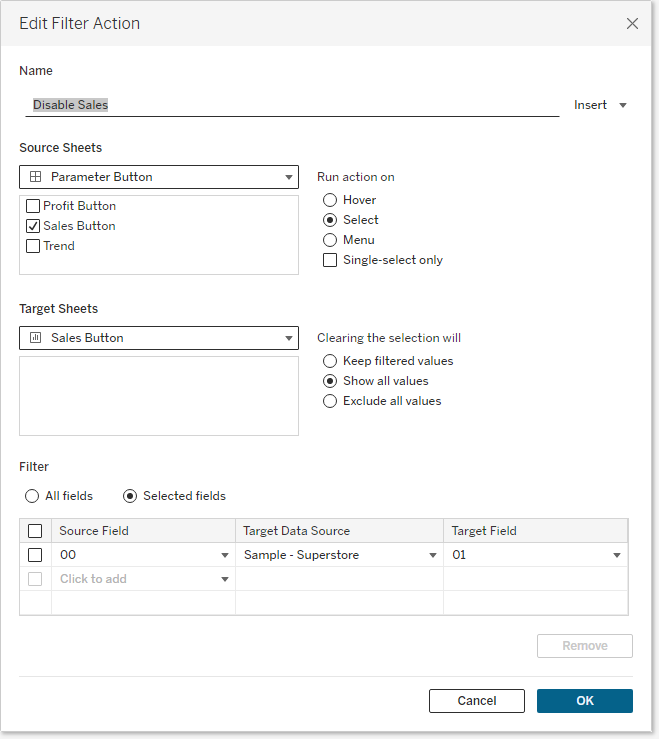
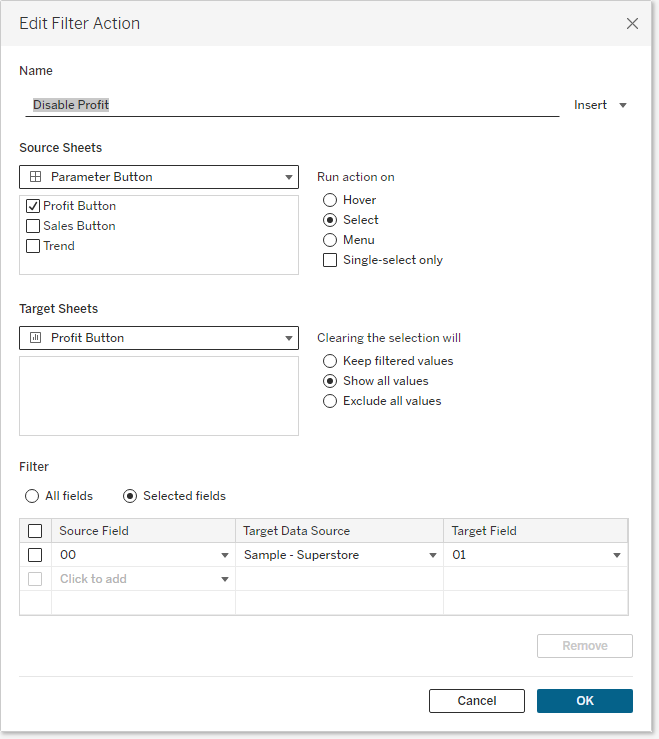
You can now create a parameter button that performs an action with just one click!
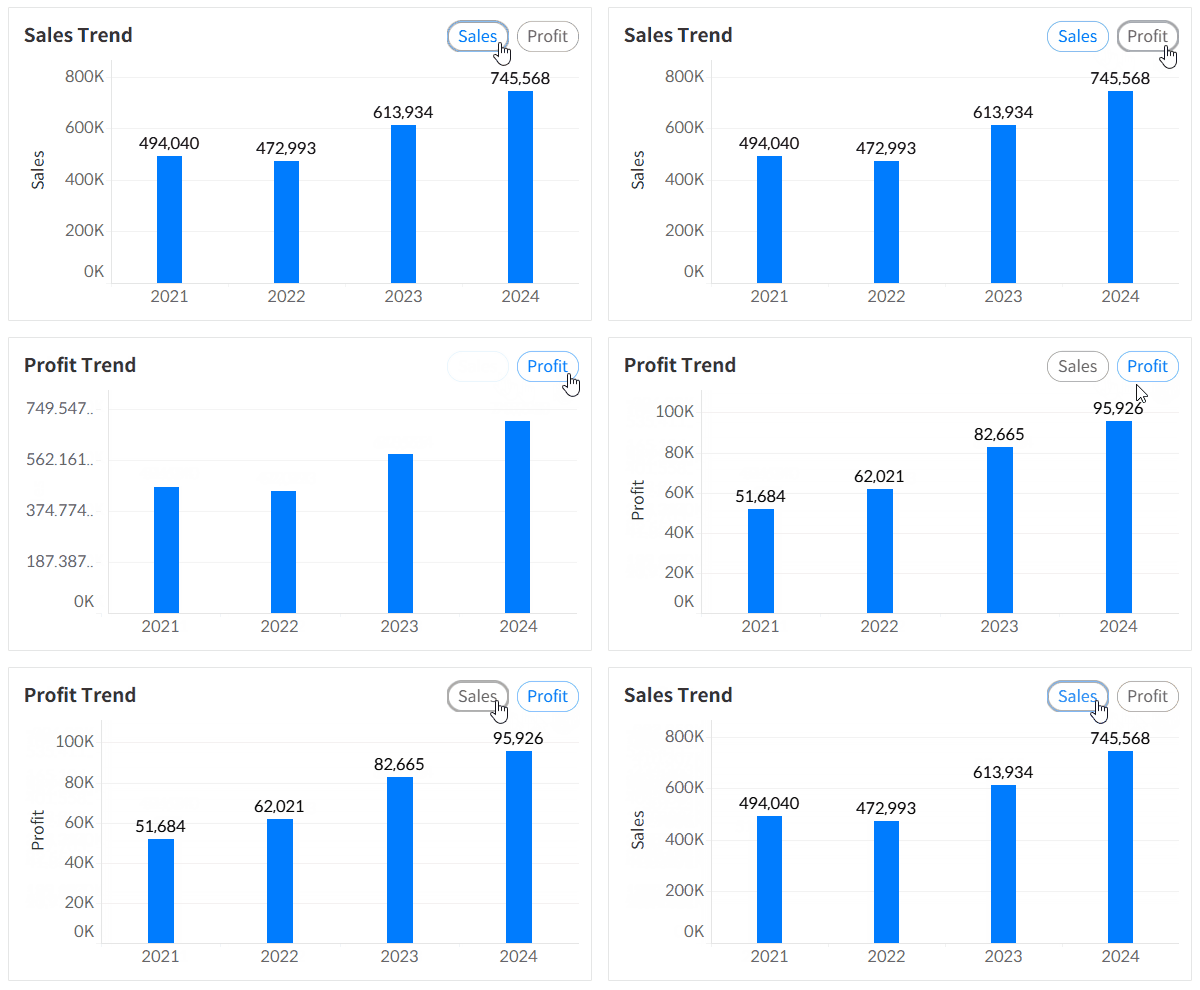
For more details, you can download and review the Tableau file below.


